Bootstrap Checkbox Position
Overview
In certain cases the easiest details might get very important-- especially the moment you come to need them. For instance exactly how do your visitors interact with the webpages you generate specifying a basic Boolean act-- simply yes or no regarding a number of the issues you need to request, exactly how they do confirm the conditions and terms or else line up a handful of the possible preferences they might have. We often get past this without paying very much of an care to the element chargeable for these types of activities however the Bootstrap Checkbox State is actually a quite significant feature-- one our forms just can't in fact do without.
Located in the most recent fourth edition of the Bootstrap framework we are provided with the
.form-check.form-check-label<div>.form-check.form-check-label<label><input>.form-check-inputThe ways to employ the Bootstrap checkbox:
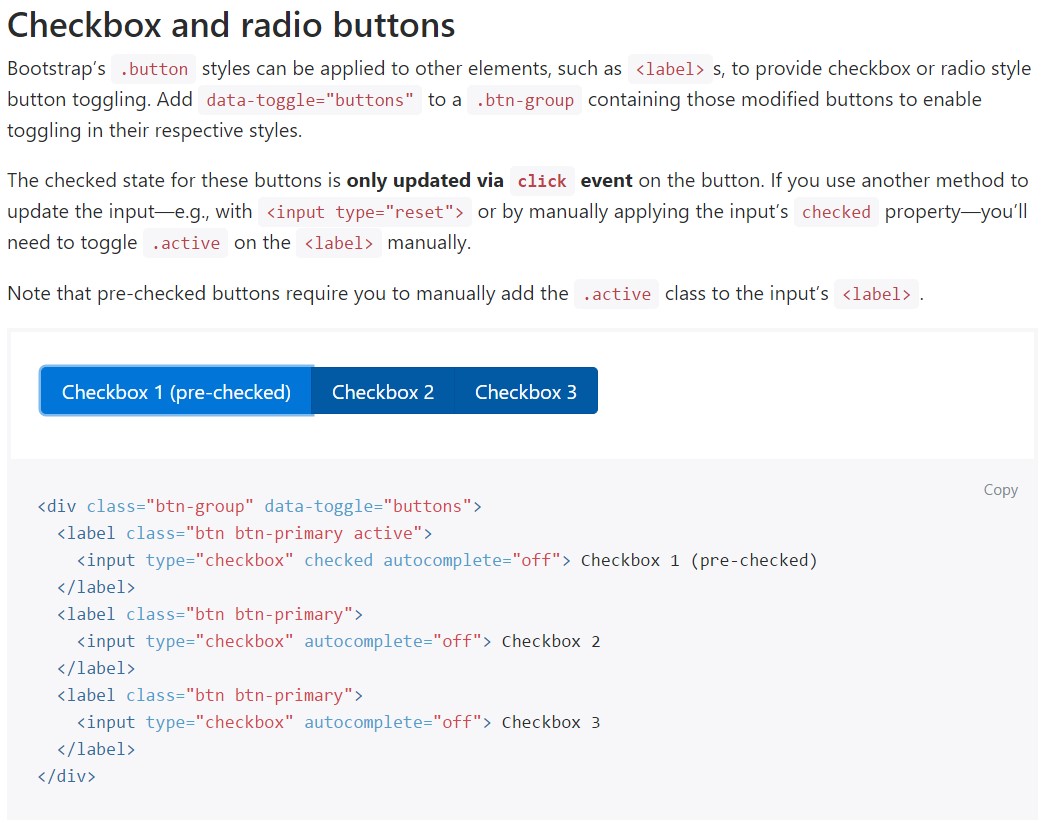
The inspected state for such buttons is only up-dated with click event on the button. If you put into action some other solution to upgrade the input-- e.g., with
<input type="reset">.active<label>
<div class="btn-group" data-toggle="buttons">
  <label class="btn btn-primary active">
    <input type="checkbox" checked autocomplete="off"> Checkbox 1 (pre-checked)
  </label>
  <label class="btn btn-primary">
    <input type="checkbox" autocomplete="off"> Checkbox 2
  </label>
  <label class="btn btn-primary">
    <input type="checkbox" autocomplete="off"> Checkbox 3
  </label>
</div>
In certain cases we want to have the checkboxes to come in our forms without the customer really having the opportunity to have some practice selecting them-- that is definitely where the disabled option shows up.
To disable appropriately a checkbox in Bootstrap 4 working with the typical HTML attribute
disabledIn case you like the idea and actually want to accomplish this you have to assign the
.disabled.form-checkSome other scenario
If utilizing checkboxes, wrap all of them in a
<label>.custom-control.custom-checkboxUtilize
.custom-control-input<input>Additionally put into action two
<span>.custom-control-indicator.custom-control-description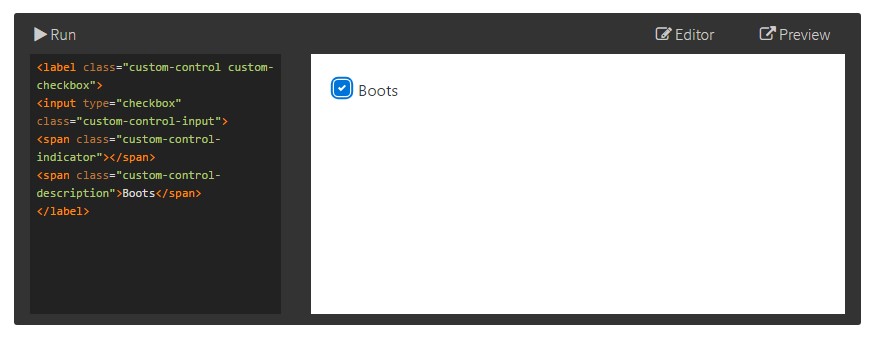
<label class="custom-control custom-checkbox">
<input type="checkbox" class="custom-control-input">
<span class="custom-control-indicator"></span>
<span class="custom-control-description">Boots</span>
</label>
Bootstrap Checkbox Style forms
Default radios and checkboxes are developed upon with the assistance of
.form-checkThe disabled class will in addition lighten the text color tone to help signify the input's state.
A fresh detail for the Bootstrap edition 4 system is the creation of the so called customized form features. These are the similar components we are known inside usefulness yet styled way more appealing and also in the Bootstrap means. Utilizing them you may put in some spice and style to your content through just appointing a few additional classes to the commands you involve in your forms.
In order to utilize customized checkboxes wrap them within a
<label>.custom-control.custom-checkbox<input>.custom-control-input<span>.custom-control-indicator.custom-control-descriptionConclusions
That's nearly all that you must do in order to bring in a checkbox element within your Bootstrap 4 powered web pages and add in certain custom flavor to it adding in it a fantastic appeals. Currently all you require to do is repeat the drill unless you have actually inspected every one of the checkboxes required are readily on the webpage.
Review a few youtube video guide relating to Bootstrap checkbox
Connected topics:
Bootstrap checkbox authoritative records
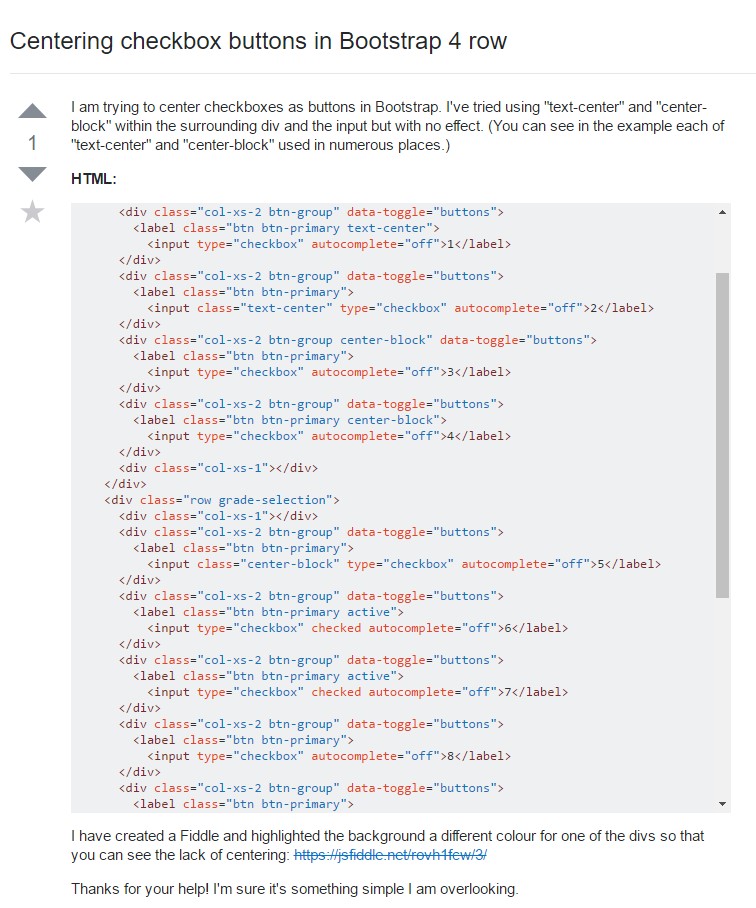
Centering checkbox buttons in Bootstrap 4 row
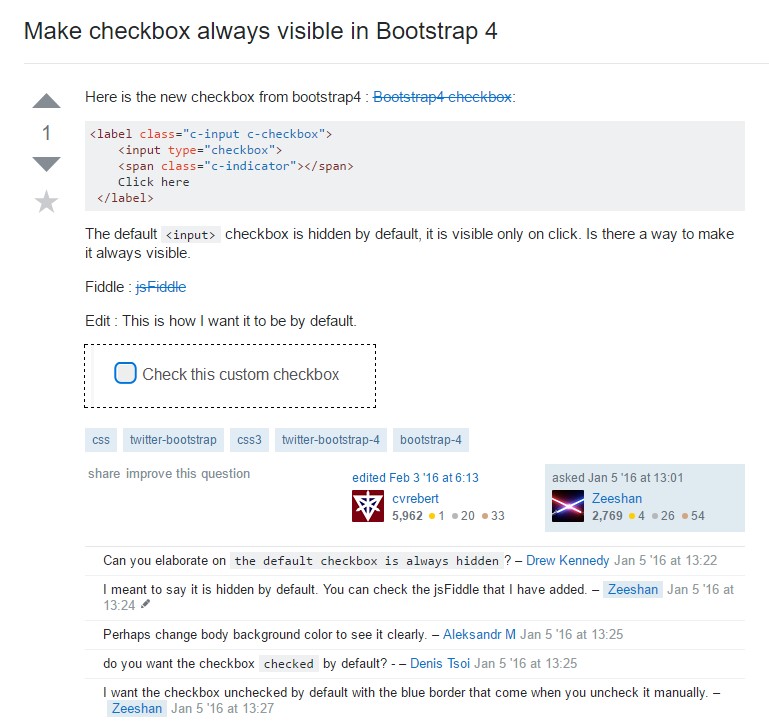
Make checkbox always visible in Bootstrap 4